


In project management, having the right tools is key. ClickUp, a versatile project management tool, is now a favorite among teams for its robust features and seamless collaboration. In this guide, we'll dive into 18 ClickUp tips and tricks to help you unlock its full potential and boost your team's productivity.
1. Familiarize yourself with the ClickUp Hierarchy
To fully harness ClickUp's capabilities, start by understanding its hierarchy. Navigate through workspaces, spaces, folders, tasks, and lists to grasp the key elements and features for task management. Mastery of the ClickUp interface ensures a smoother workflow, aided by essential elements like the sidebar and task views.
A very important point when you are at this stage of Clickup is to know its ClickApps, which allow you to define priorities, assignees, labels, time tracking, etc. You must navigate them all, because there is a ClickApp for every situation.
💡Tip: Access the "Interactive Tour" or ClickUp Tutorial. This guided mode will walk you through key sections and features of ClickUp, providing a practical introduction.
2. File sharing and integrations
Connect ClickUp with tools like Slack, Google Drive, and Google Calendar for seamless file sharing and collaboration. This integration ensures centralized access to relevant documents and communication within ClickUp.
💡 Tip: Use the SavedTask App where you can transform Slack messages into ClickUp tasks with a simple emoji reaction. This way you save time creating tasks in ClickUp and you will never forget something lost among the thousands of Slack conversations.

Currently you can have free access to SavedTask. With this test you can convert 15 messages into tasks per month.
3. Setting up workspaces and teams
Create dedicated workspaces for distinct projects and teams within ClickUp. Tailoring settings, permissions, and layouts to specific project requirements enhances overall efficiency.
Note that workspaces cannot be transferred between spaces, so host all relevant teams or departments within the same workspace.
Once you've established your workspace, you'll unlock a powerful tool: ClickUp Dashboards. This tool gives you the ability to create custom visual dashboards, offering a consolidated view of your tasks, projects, and crucial data.
You can include widgets that show project progress, priority tasks, key reports, and more. This feature takes work management to the next level, providing a centralized tool for informed decision making and real-time monitoring.
💡Tip: Import data directly into ClickUp to quickly set up your workspace and equipment. This feature allows you to upload information from spreadsheets or other sources, streamlining the creation of tasks and team members.
4. Customizing task views
Experiment with various task views – list, board, calendar, and timeline – to align with your workflow. Tailor these views to prioritize tasks, set due dates, and track progress. The list view offers a comprehensive overview, the board view presents a dynamic, Kanban-style layout, the calendar view provides a time-centric perspective, and the timeline view offers a visual roadmap.
💡 Tip: Take advantage of ClickUp's filters to show only relevant tasks in a particular view. Set specific criteria, such as task status, assigned to, or tags, to quickly focus on what matters.
5. Prioritizing or breaking tasks
Leverage ClickUp's priority features to focus on critical tasks. Set deadlines and dependencies to ensure efficient task completion and improved project efficiency. Break down complex tasks into subtasks or embed detailed checklists within tasks. Assigning specific subtasks to team members promotes collaborative task completion.
💡 Tip: Within the tasks, use the checklist function with priorities. You can assign priorities to specific items within a checklist, highlighting the most crucial aspects. Also, set up automations in ClickUp to receive reminders and updates on the status of your tasks. This keeps you aware of changes and helps you adjust priority as necessary.
6. Enhance collaboration with your team
Utilize ClickUp's communication tools, such as comments and mentions within tasks, to centralize discussions. Encourage team members to communicate directly within the platform, ensuring a clear record of conversations.
💡 Tip: Take advantage of ClickUp's integration with Gmail, ensuring that notifications and updates are reflected in your email. This allows team members to access key information directly from their Gmail accounts.
7. Set the toolbar to favorites
This is essential for easier platform navigation. Simply set the toolbar to favorites, and you can easily locate your lists, views, folders, dashoboards or spaces without wasting time.
💡 Tip: Customize the views you have set with the desired name. This does not alter the original name of the task, view, or table. To learn how to configure your favorites based on the version of ClickUp you are using, click here.
8. Unlocking endless possibilities with ClickUp Docs
Explore the versatility of ClickUp Docs, seamlessly integrating into the broader ClickUp ecosystem. You can also add documents as views to lists or folders, providing ideal shared references for documents like glossaries, best practices, or standard operating procedures (SOPs).
💡Tip: Take advantage of the mentions functionality within ClickUp Docs to create an interconnected network of information. Mention tasks, users, or even other documents directly within your Docs, creating a collaborative and cohesive experience. This dynamic integration boosts efficiency by centralizing key information in one place and making it easier to navigate between different project elements.

9. Apply ClickUp Automations
Explore ClickUp's automation features to reduce manual tasks. Create custom automations for routine tasks, such as task assignments, status updates, and reminders, streamlining your workflow.
💡Tip: Automations must have a trigger, a condition and an action. If you don't know which trigger or action to apply, use the automation templates and take inspiration from the predefined ones. If it matches what you need to do, you can use them without making changes or customize them.

10. Use ClickUp Templates
Optimize the initiation of projects with ClickUp templates, which provide ready-made frameworks to establish a consistent foundation for various project types. Tailor these templates to align with your team's specific needs, expediting the commencement of projects.
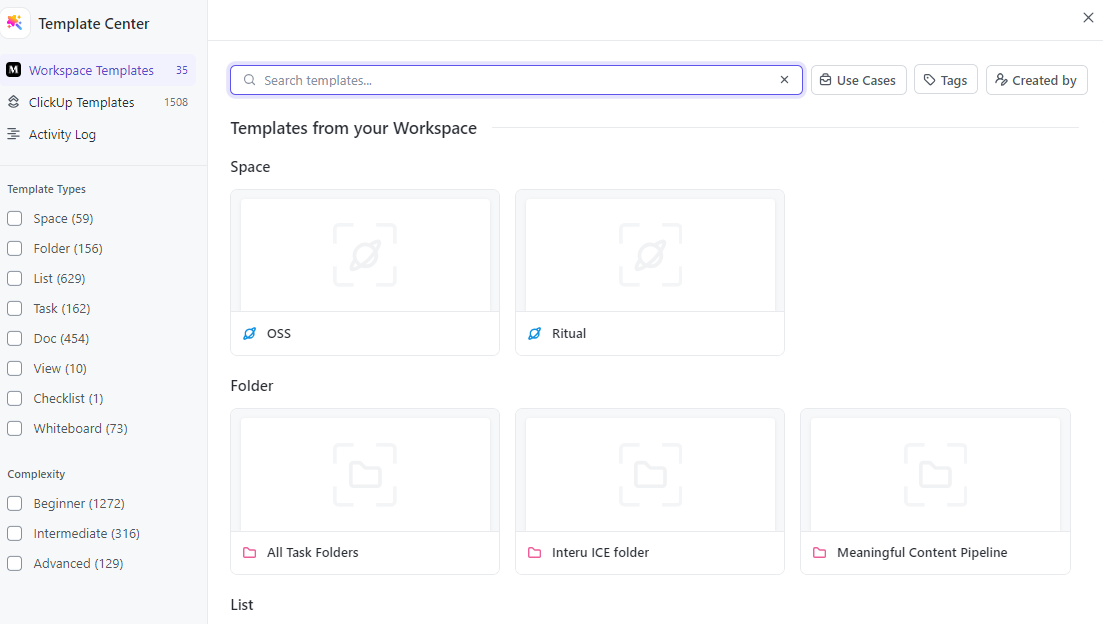
Templates offer the advantage of preserving and reusing configurations for spaces, folders, lists, tasks, and checklists, eliminating the need to recreate them for every new project.
- Here's how to create a template: Navigate to the desired item (space, folder, list, task, or checklist), click on the ellipsis (...), then open the Templates menu and and select "Save as Template." Follow the prompts to complete the process.
- To leverage a saved template, follow these steps: When creating a new item, locate the 'Use a Template' option at the top and simply choose your saved template from the list. This efficient approach streamlines your workflow and ensures consistency across projects.
💡Tip: Before importing your template, you can decide whether to import all the elements or select only those that interest you. You can do it using the "Customize import items" option.
11. Set SMART Goals
Implement SMART goals within ClickUp for precise project planning. Specific, Measurable, Achievable, Relevant, and Time-bound goals provide a clear roadmap. Break down SMART goals into actionable tasks, track progress, and ensure alignment with broader objectives.
💡Tip: A good way to create SMART goals is by using the ClickUp Goals feature. This way it will help you subdivide them into smaller ones. This way it is easier to track them and, above all, comply with them.
12. Block time on your calendar to avoid distractions
Improve time management by blocking specific periods on your calendar using ClickUp. Assign time slots for tasks, projects or meetings to visually organize your day and increase productivity.
💡Tip: Use the "Due Date" and "Time Blocking" Clickup features to easily manage and block time on your calendar. Create specific tasks dedicated to blocking time on your calendar. For example, "Focus on Project A from 10:00 to 12:00." Use the description to detail what you plan to do during that time.
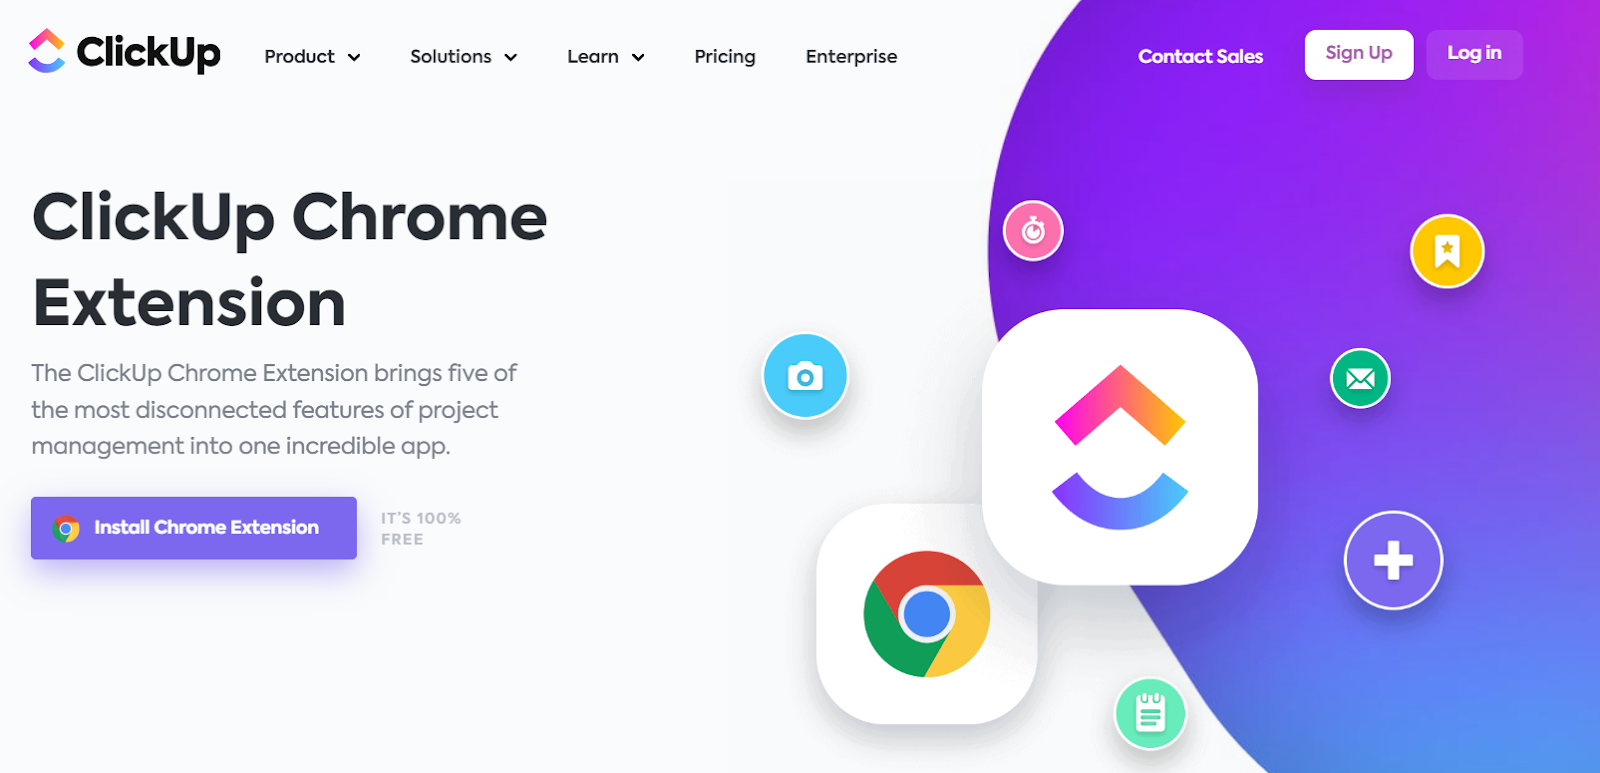
13. Install the ClickUp Chrome Extension
Enhance productivity with the ClickUp Chrome Extension, seamlessly integrating ClickUp functionalities into your browser. Quickly access tasks, updates, and collaboration features directly from your browser.
💡Tip: Use the extension’s Screenshot feature to capture portions of the screen and attach them to a new task. This is particularly useful to leave feedback or report bugs to your team.
14. Use custom fields and priorities to distribute your workload
Efficiently manage your workload with ClickUp's custom fields and priorities. Tailor task details, categorize, track, and allocate tasks based on specific criteria. Establish a clear hierarchy with priority settings, ensuring a strategic distribution of work among team members.
💡Tips:
- Take advantage of the option to assign colors and labels to your custom fields. This makes it easy to quickly and visually identify key information in your tasks.
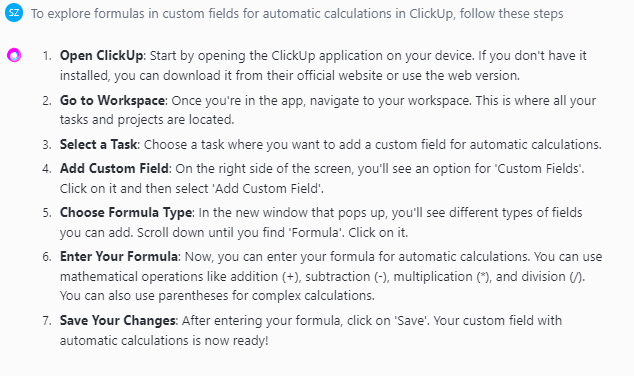
- Also, explore formulas in custom fields for automatic calculations. This is useful for calculating due dates, time estimates, or any other numerical metrics.
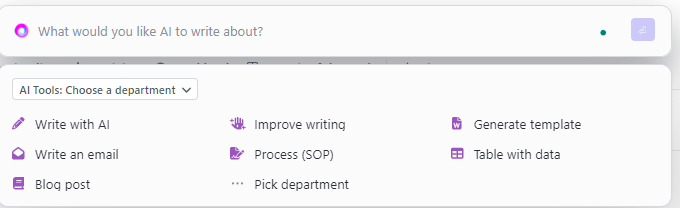
15. Take advantage of ClickUp's artificial intelligence
Using ClickUp AI can help you automate routine and repetitive tasks thanks to its smart suggestions that adapt to your work habits and simplify your workflow.
Experiment with intelligent sorting and filtering that intuitively organizes tasks based on context, making it easy to prioritize and locate critical items. Additionally, you can ask them to analyze the team's capacity and workload to ensure optimal distribution.
💡Tip: Use ClickUp AI to generate new doc templates automatically.
16. Boost efficiency using keyboard shortcuts and commands
Elevate efficiency in ClickUp with keyboard shortcuts and quick commands. Master essential shortcuts to navigate, manage tasks, and interact effortlessly within the tool, integrating them into your routine for enhanced productivity.
💡Tip: Start by memorizing the most useful and frequently used shortcuts, such as "h" to go to the main page (Home) and "@" to mention a person. These are just a few examples of the shortcuts available in ClickUp. Remember, you can view the full list of shortcuts at any time by pressing "Ctrl + /".
Explore the option to customize shortcuts to better align with your workflow. Click the link to discover all the ClickUp shortcuts.
17. Gantt Charts and Dependencies
ClickUp's Gantt Charts and Dependencies feature enhances project management by providing a visual representation of task timelines and interdependencies. This feature is instrumental in streamlining coordination, optimizing scheduling, and ensuring successful project outcomes.
💡Tips:
- Encourage your team to actively use Gantt Charts for visualizing project timelines. Emphasize the importance of accurately setting task dependencies to ensure a well-structured workflow.
- Conduct training sessions to familiarize team members with the benefits of Gantt Charts and Dependencies in ClickUp.
- Regularly review and update Gantt Charts to adapt to changes in project requirements.
18. Use Time Tracking in Tasks
Each task in ClickUp can be linked to a timer. This allows users to record time spent on a specific task. You can start and stop the timer as needed.
In addition to real-time tracking, ClickUp allows for manual time recording. You can enter hours worked directly into the task, which is useful for those who prefer to record time after completing a task.
💡Tip: When using time tracking in ClickUp, take full advantage of the ability to add specific details to each timer. When starting a timer for a task, include relevant information such as the specific focus, milestones reached, or any details that may be useful for future reference.
These details not only provide a more complete record of your activities, but also make it easier to review and analyze how time has been spent.
As you will see, ClickUp is a comprehensive project management tool that can significantly streamline your work. By taking advantage of its integration capabilities with other apps, such as SavedTask, you can maximize both your productivity and that of your team.


